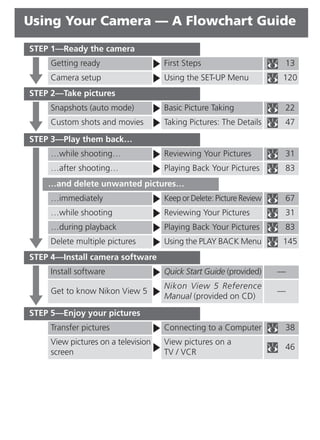
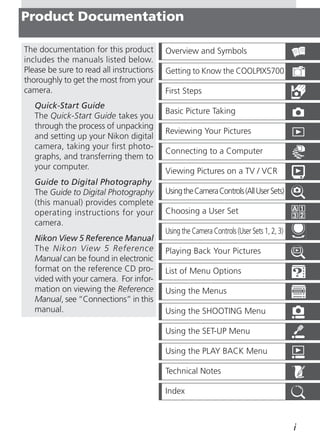
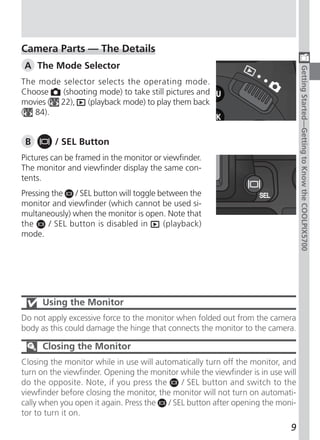
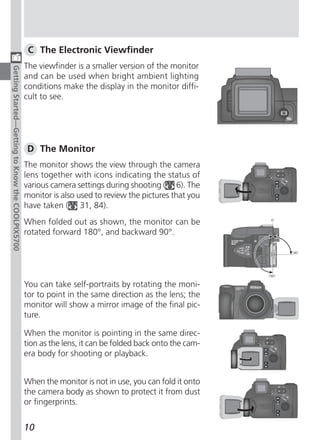
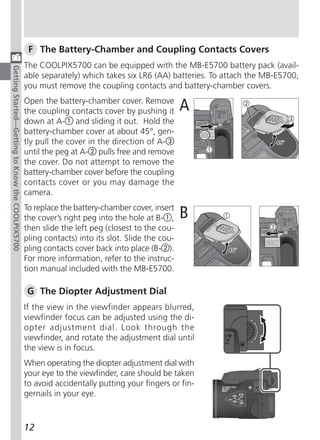
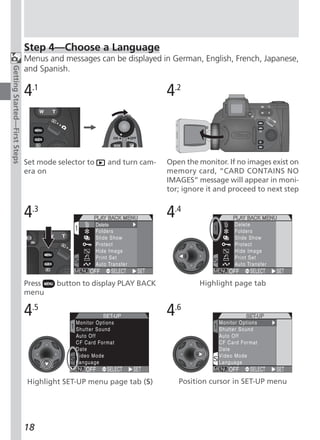
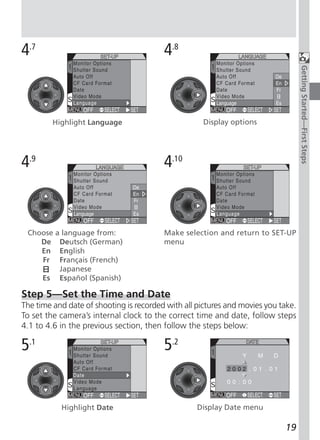
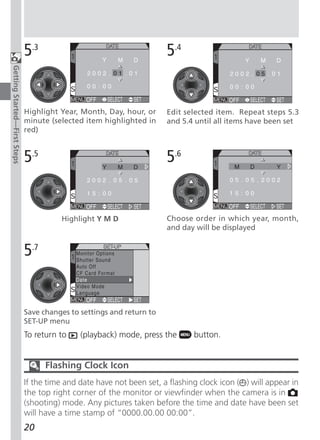
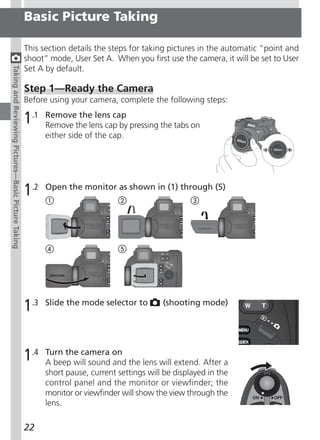
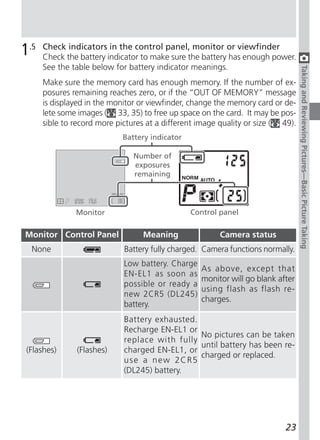
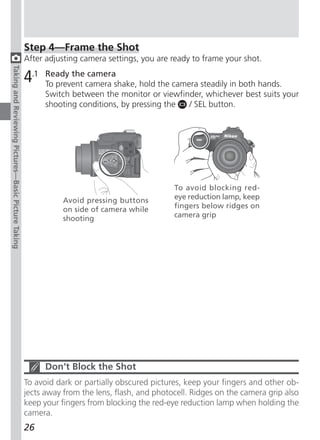
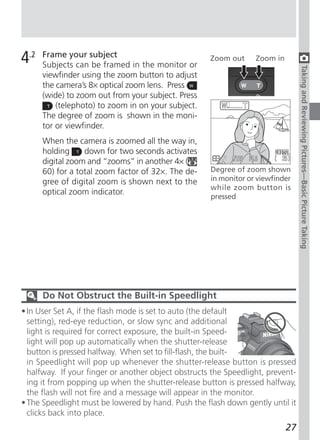
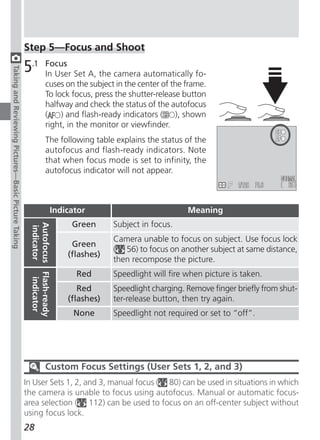
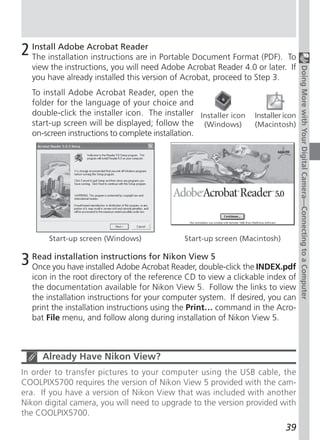
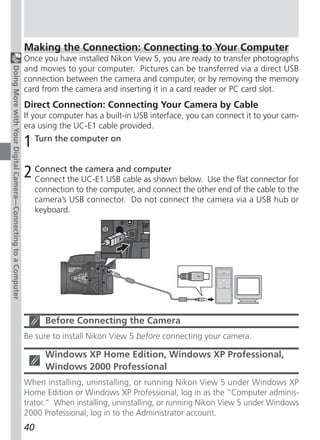
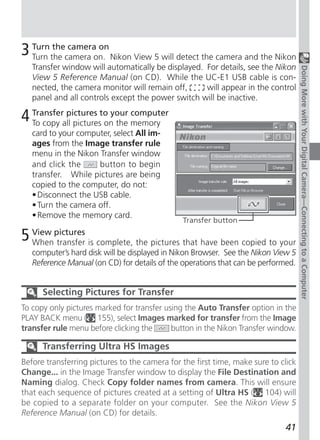
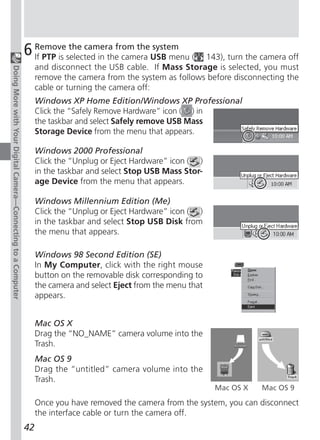
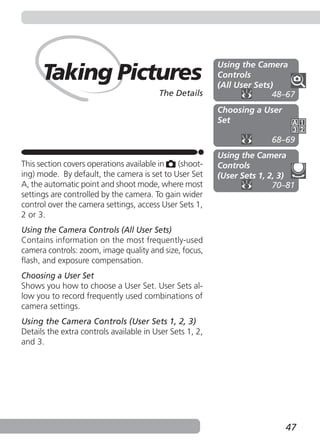
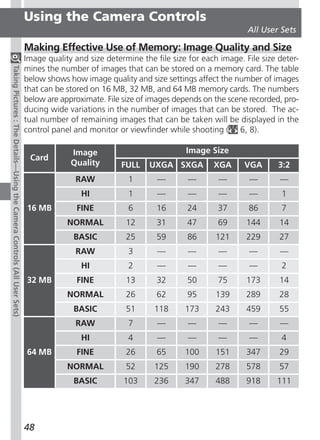
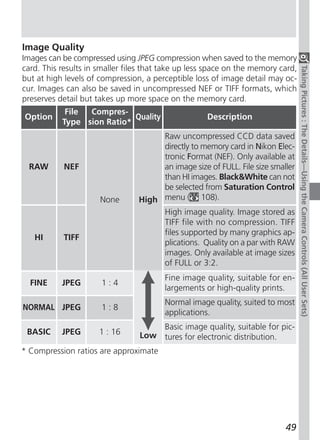
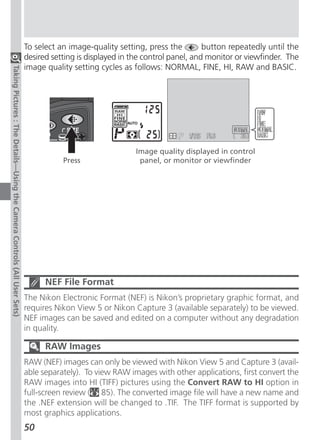
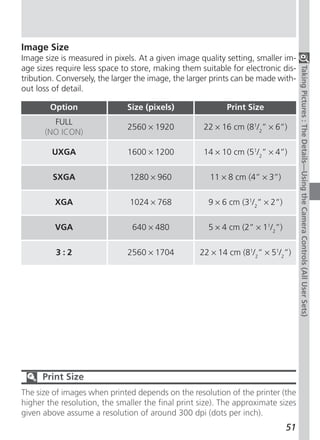
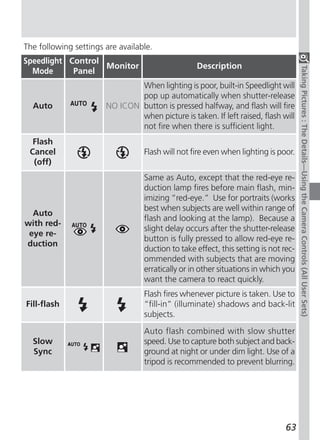
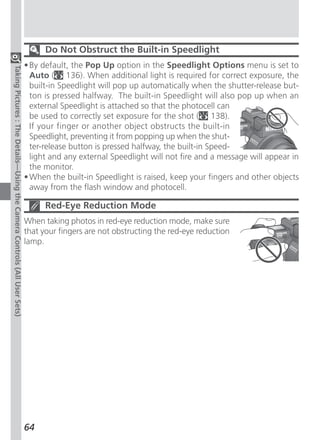
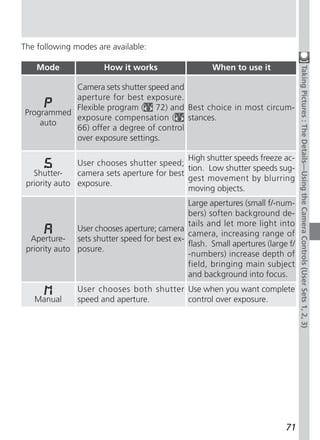
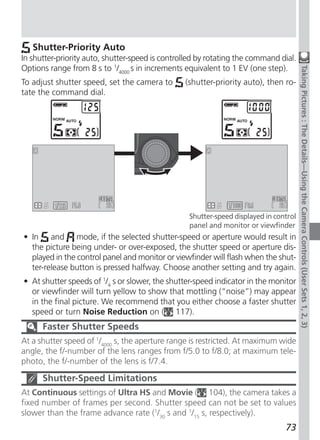
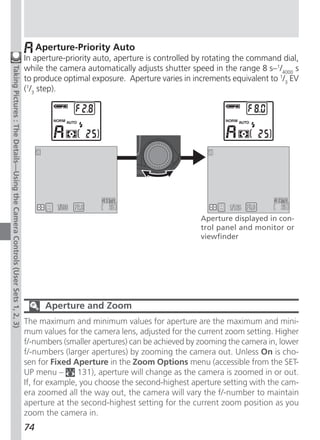
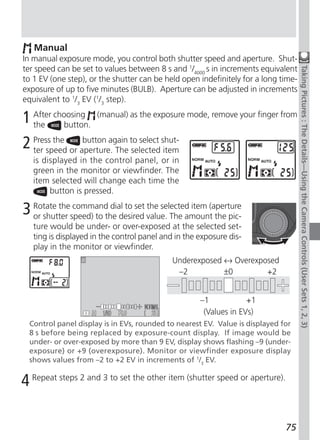
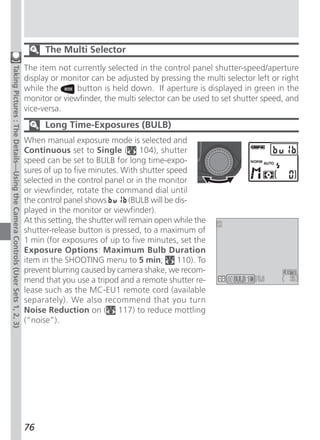
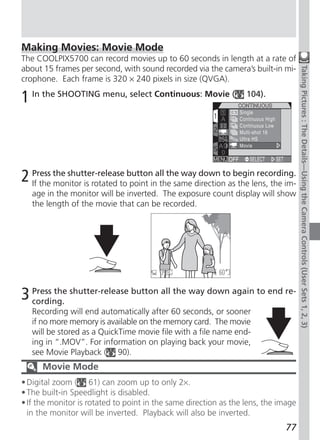
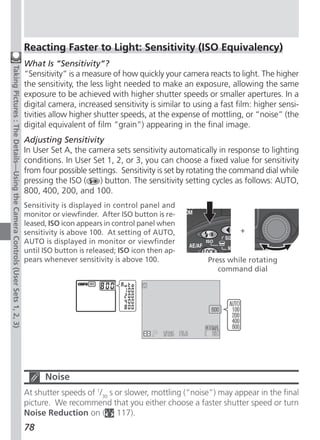
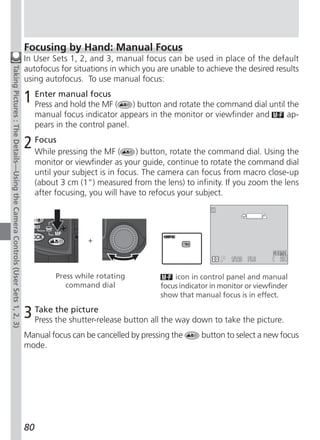
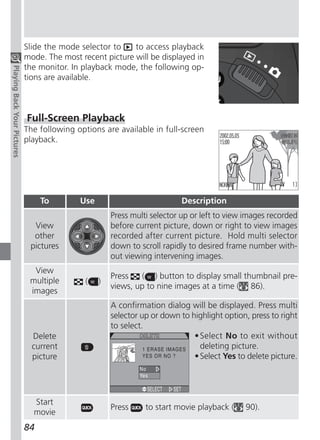
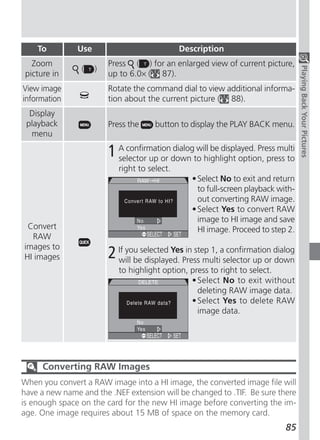
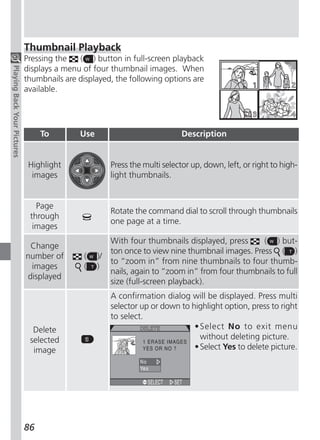
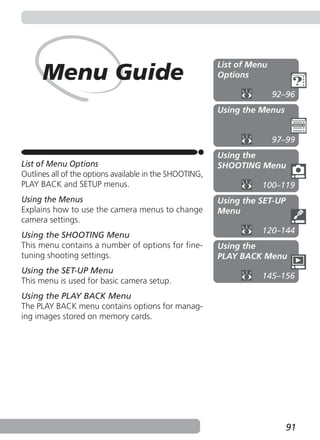
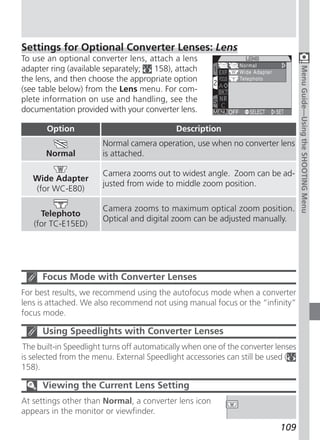
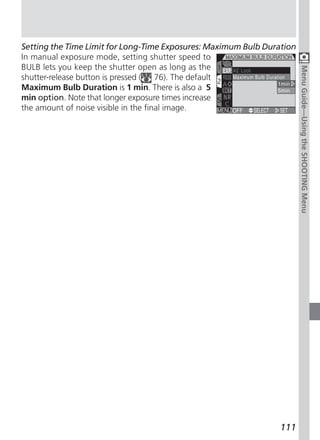
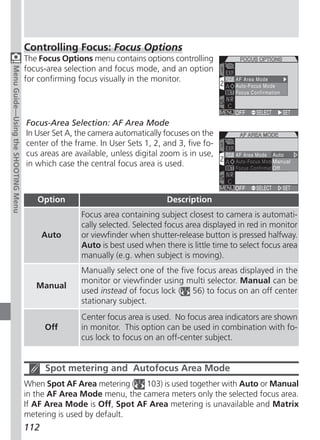
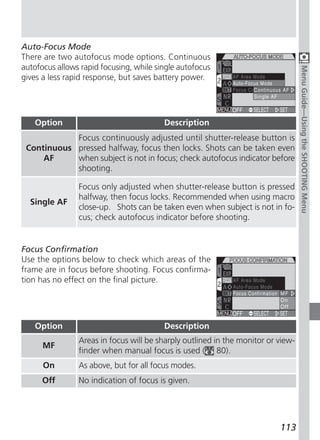
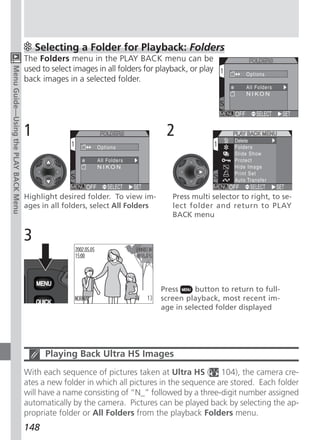
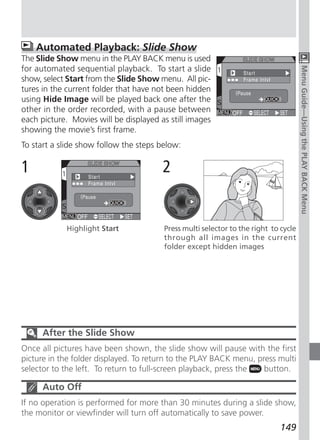
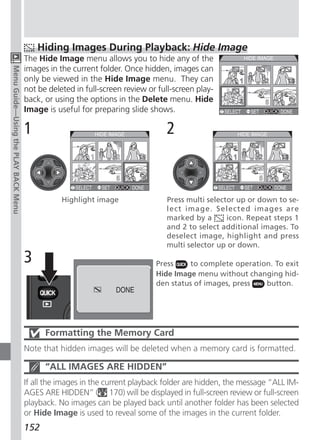
This document provides an overview and instructions for using a Nikon Coolpix 5700 digital camera, including first steps like inserting the battery and memory card, basic picture taking functions, reviewing and playing back photos, connecting the camera to a computer, and advanced camera controls and menu settings. The documentation covers all aspects of operating the camera from initial setup through taking, viewing, and transferring pictures.


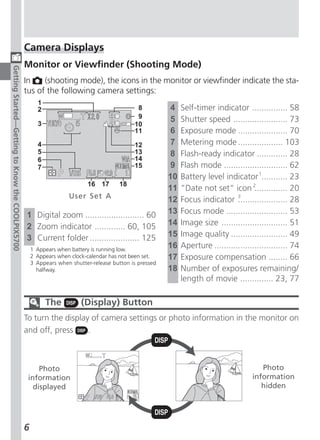
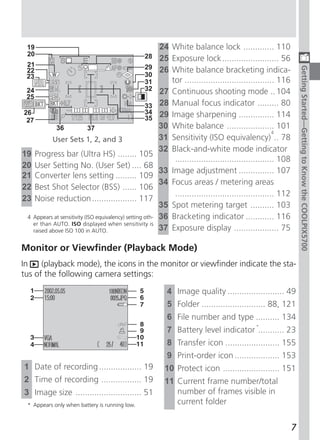


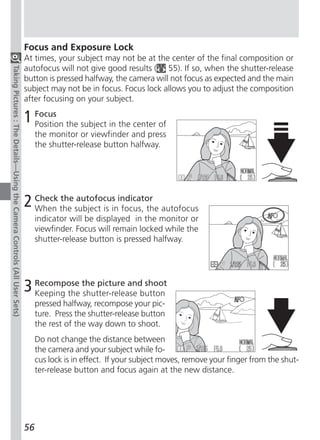


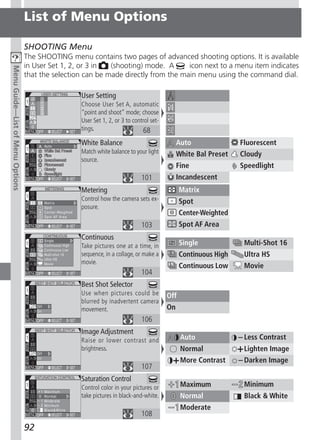
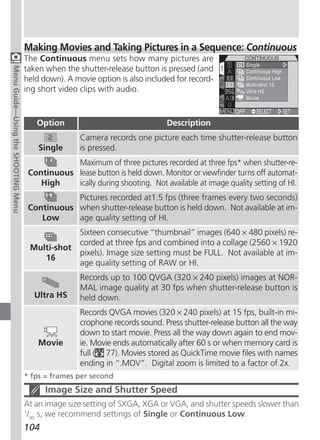
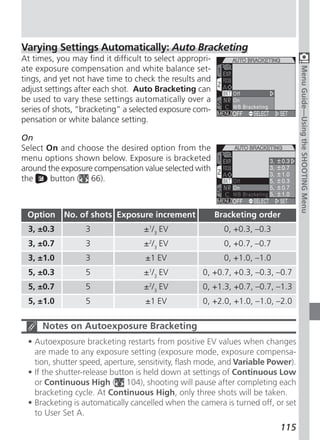
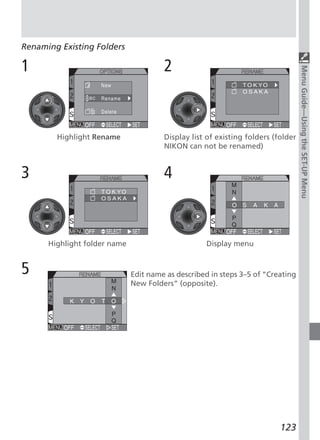
![Preset White Balance
Preset white balance is used to adjust white balance
when shooting under mixed lighting or to compensate
Menu Guide—Using the SHOOTING Menu
for light sources with a strong color cast. When
(White Bal Preset) is selected from the White Balance
menu, the camera will zoom in and the menu shown
at right will be displayed in the monitor or viewfinder.
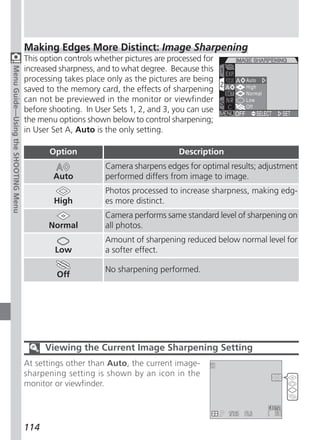
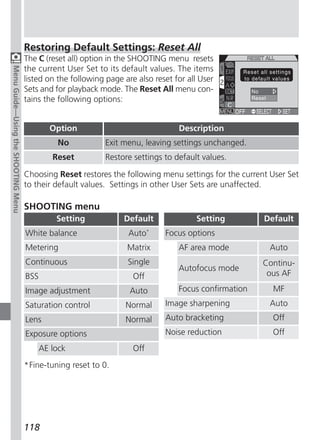
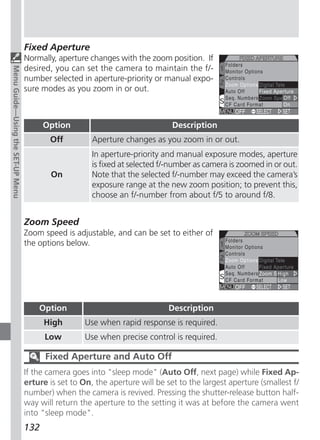
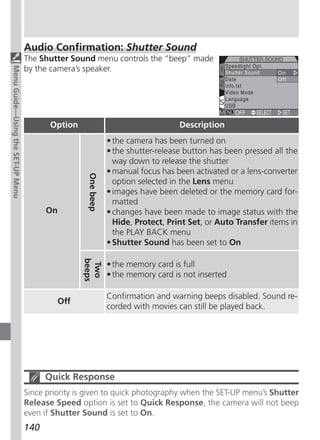
Option Description
Recalls the most recent setting for preset white balance
Cancel
from memory and sets white balance to this value.
Measures a new value for white balance. Place a
white object, such as a piece of paper, under the
lighting that will be used in the final picture. Frame
this object so that it fills the square in the center of
Measure the menu shown above. Highlight Measure and
press the multi selector to the right to measure a new
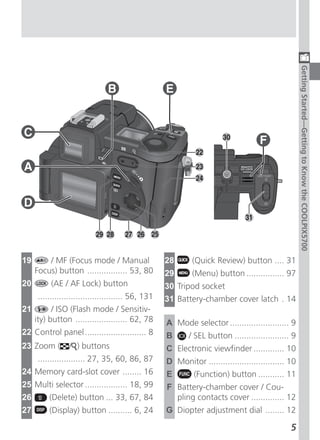
value for white balance (shutter will be released and
camera will return to original zoom position, but no
picture will be recorded).
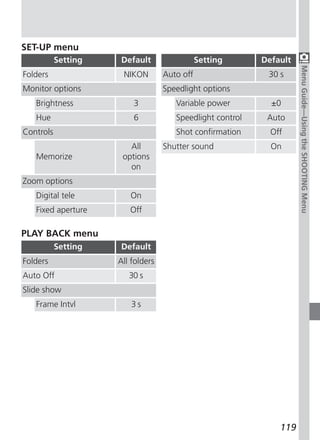
Fine-Tuning White Balance
At settings other than (Auto) and (White Bal
Preset), white balance can be “fine tuned” by high-
lighting the desired setting and rotating the command
dial to select an adjustment (–3 to +3) from the menu.
Raising white balance tends to give images a blue cast,
while lowering white balance generally makes pictures
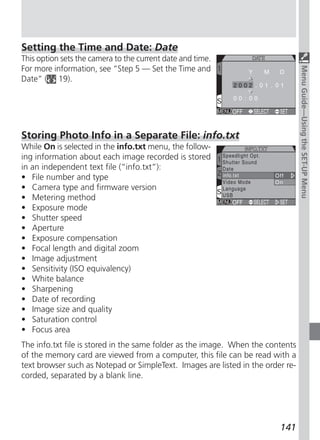
appear slightly yellow or red. In the case of (Fluorescent), the menu offers
a choice of bulb types (see table below).
Option Bulb Type
FL1 White (W)
FL2 Daylight White (Neutral [N])
FL3 Daylight (D)
102](https://image.slidesharecdn.com/nikoncoolpix5700-110327063251-phpapp01/85/Nikon-coolpix-5700-114-320.jpg)


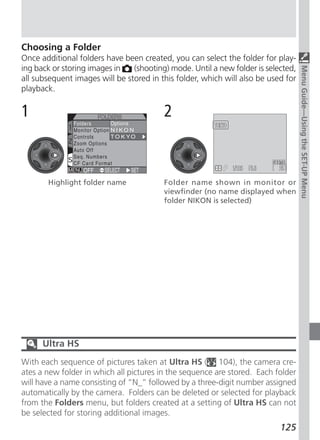
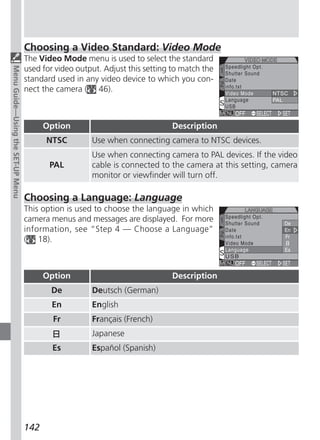

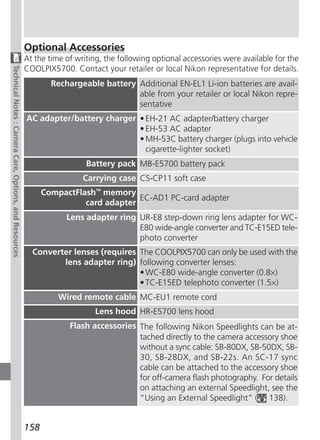


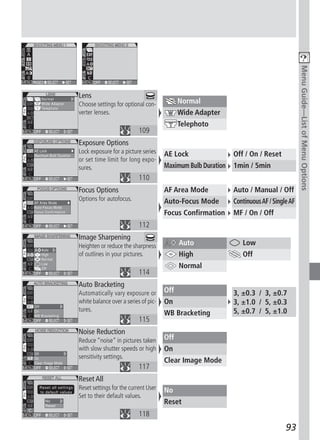
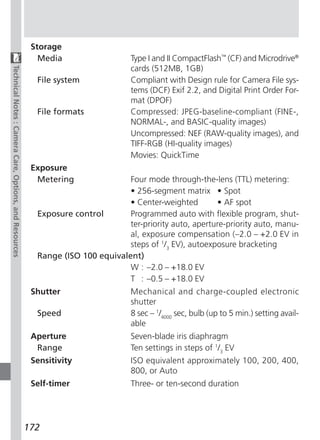
![Specifications
Type E5700 digital camera
Technical Notes : Camera Care, Options, and Resources
Effective pixels 5.0 million
2
CCD /3˝ high-density CCD; total pixels: 5.24 million
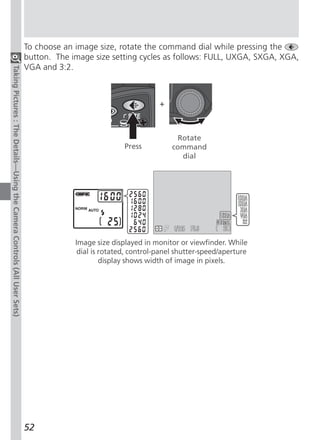
Image size (pixels) • 2560 × 1920 (Full) • 1280 × 960 (SXGA)
• 2560 × 1704 (3 : 2) • 1024 × 768 (XGA)
• 1600 × 1200 (UXGA) • 640 × 480 (VGA)
Lens 8× Zoom Nikkor
Focal length F = 8.9 – 71.2 mm (35-mm [135] camera format
equivalent: 35 – 280 mm)
f/-number f/2.8 – f/4.2
Construction Fourteen elements in ten groups
Digital zoom 4×
Autofocus (AF) Contrast-detect through-the-lens (TTL) AF
Focus range 50 cm (1´8˝) – ∞; 3 cm (0.8˝) – ∞ in macro and
manual focus modes (middle zoom position)
Focus-area selection Five-area multi AF and spot AF available
Viewfinder Color LCD viewfinder, 0.44˝, 180,000-dot, high
temperature polysilicon TFT LCD with diopter ad-
justment
Magnification 0.27 – 2.1×
Frame coverage Approximately 97% vertical and 97% horizontal
Diopter adjustment –4 – +1 m–1
Monitor 1.5˝, 110,000-dot, low temperature polysilicon
TFT LCD with brightness and hue adjustment
Frame coverage Approximately 97% vertical and 97% horizontal
171](https://image.slidesharecdn.com/nikoncoolpix5700-110327063251-phpapp01/85/Nikon-coolpix-5700-183-320.jpg)
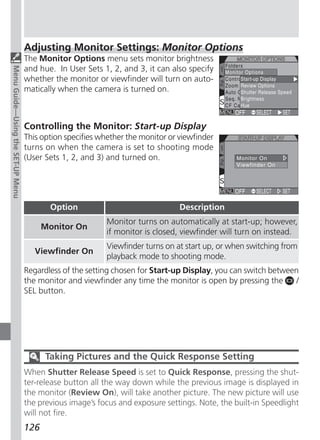
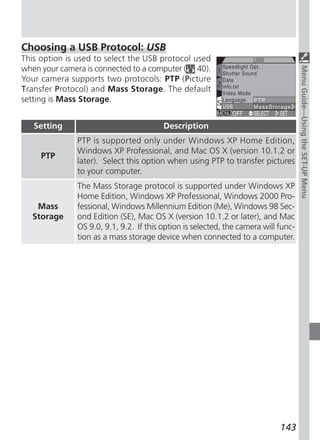
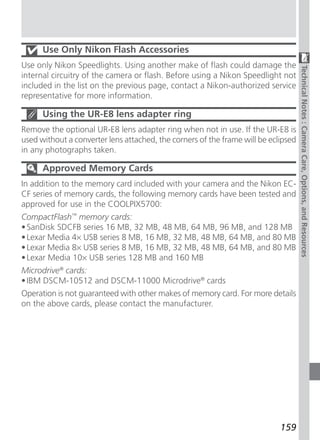
![Built-in Speedlight Equipped with automatic pop-up
Range W : 0.5 – 4.0 m (1’10” – 13’1”)
Technical Notes : Camera Care, Options, and Resources
T : 0.5 – 2.8 m (1’10”– 9’2”)
Sync method Automatic sync control
Compatible Speedlights Nikon SB-80DX, 50DX, 30, 28DX, 28, 26, 25,
24, 22s, and 22
Accessory shoe Standard ISO hot-shoe contact with safety lock
Sync contact X-contact only
Interface USB
Video output User can choose from NTSC and PAL
I/O terminals • DC input
• Audio/video (A/V) output
• Data output (USB)
Power sources • One rechargeable Nikon EN-EL1 lithium-ion
battery (supplied) or six-volt 2CR5 (DL245) lith-
ium battery (available separately)
• MB-E5700 battery pack (available separately)
with six LR6 (AA) alkaline, lithium, NiCad, or
NiMH batteries
• EH-21 AC adapter/battery charger (available
separately)
• EH-53 AC adapter (available separately)
Battery life (EN-EL1) Approximately 90 minutes (as measured at room
temperature [20 °C/68 °F] under standard Nikon
test conditions: monitor on, zoom adjusted with
each shot, flash used in approximately one third of
photographs, FULL, image quality set to NORMAL
1
Tripod socket /4” (ISO 1222)
Dimensions (W × H × D) 108 × 76 × 102 mm (4.3˝ × 3.0˝ × 4.0˝)
Weight Approximately 480g without battery and mem-
ory card
Operating Environment
Temperature 0 – 40 °C (32 – 104 °F)
Humidity Less than 85% (no condensation)
173](https://image.slidesharecdn.com/nikoncoolpix5700-110327063251-phpapp01/85/Nikon-coolpix-5700-185-320.jpg)